CatalogShoot does two jobs from the photos you already have. Master these and the rest is detail.
🧍
Create a model
Build an AI model once — body, look, vibe — and reuse it across your whole catalog. Add poses so every product gets consistent angles.
✨
Generate try-ons
Put a garment on your model in seconds. Full-resolution, nothing published yet — you review before anything reaches your store.
🚀
Publish
Add to gallery sends the photo to Shopify. The only step that touches your store — and it’s reversible (your originals are always kept).
👗
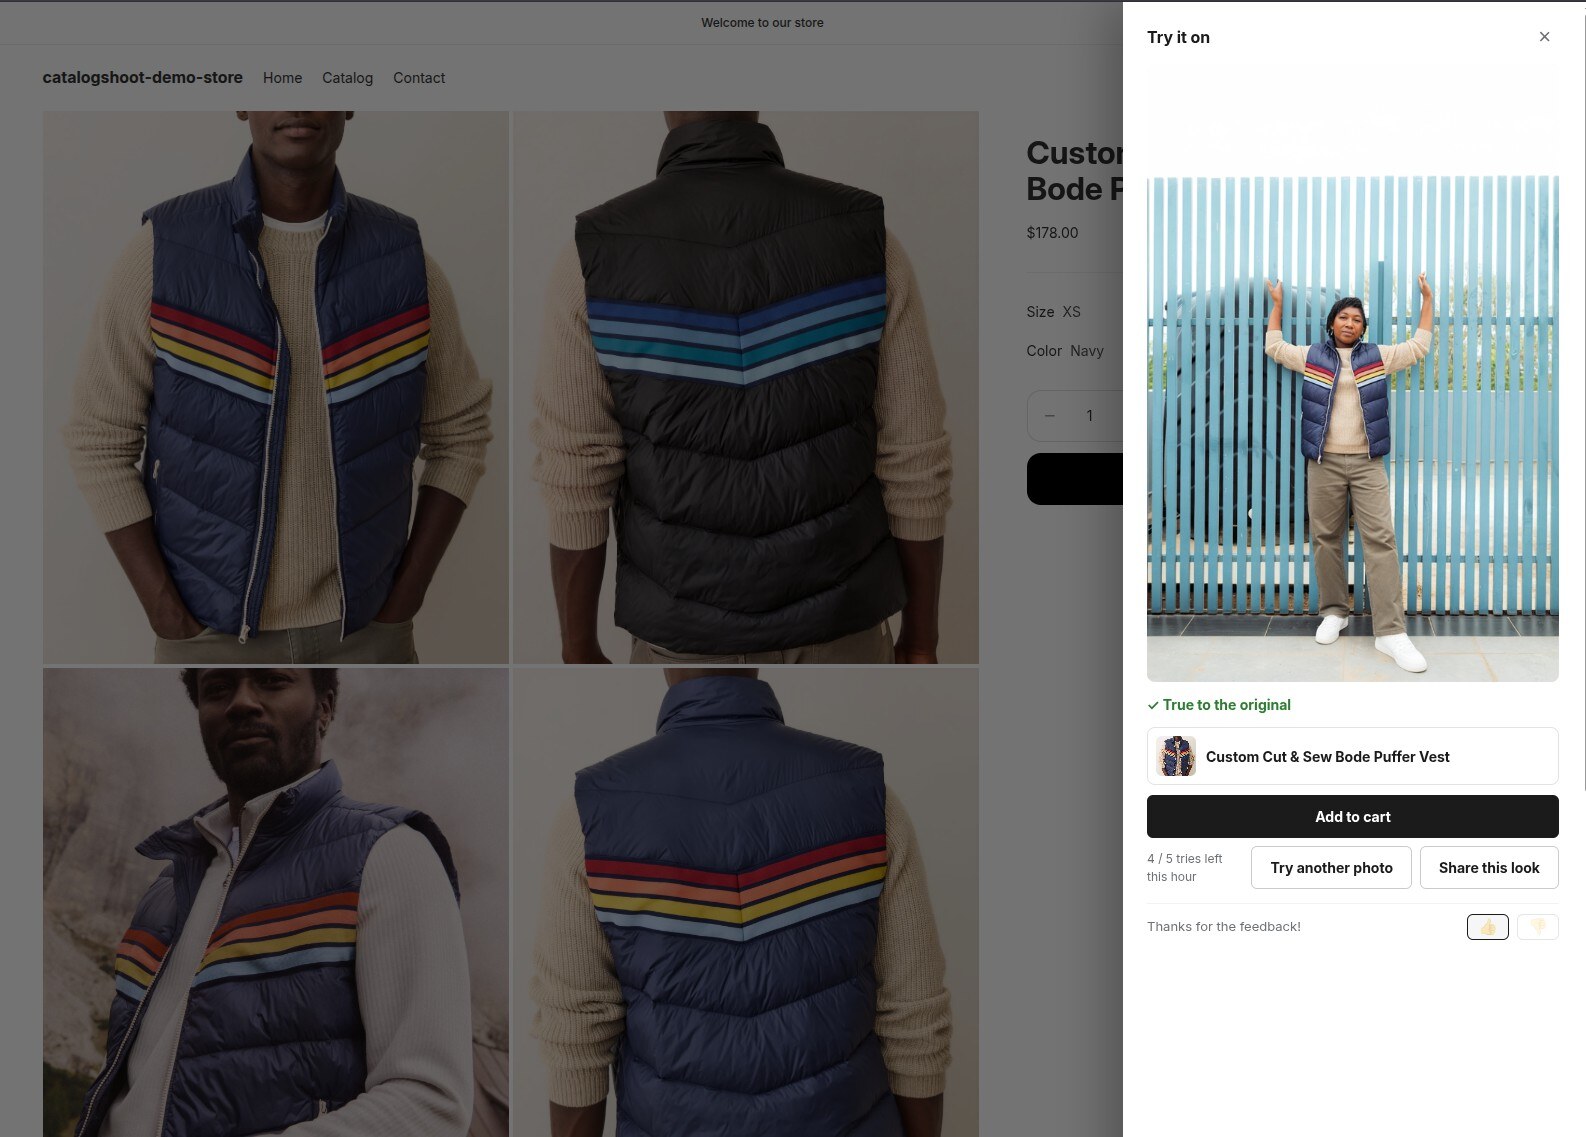
Storefront Try-On
Flip it on and shoppers try the garment on themselves from a selfie — they buy with confidence and return less.
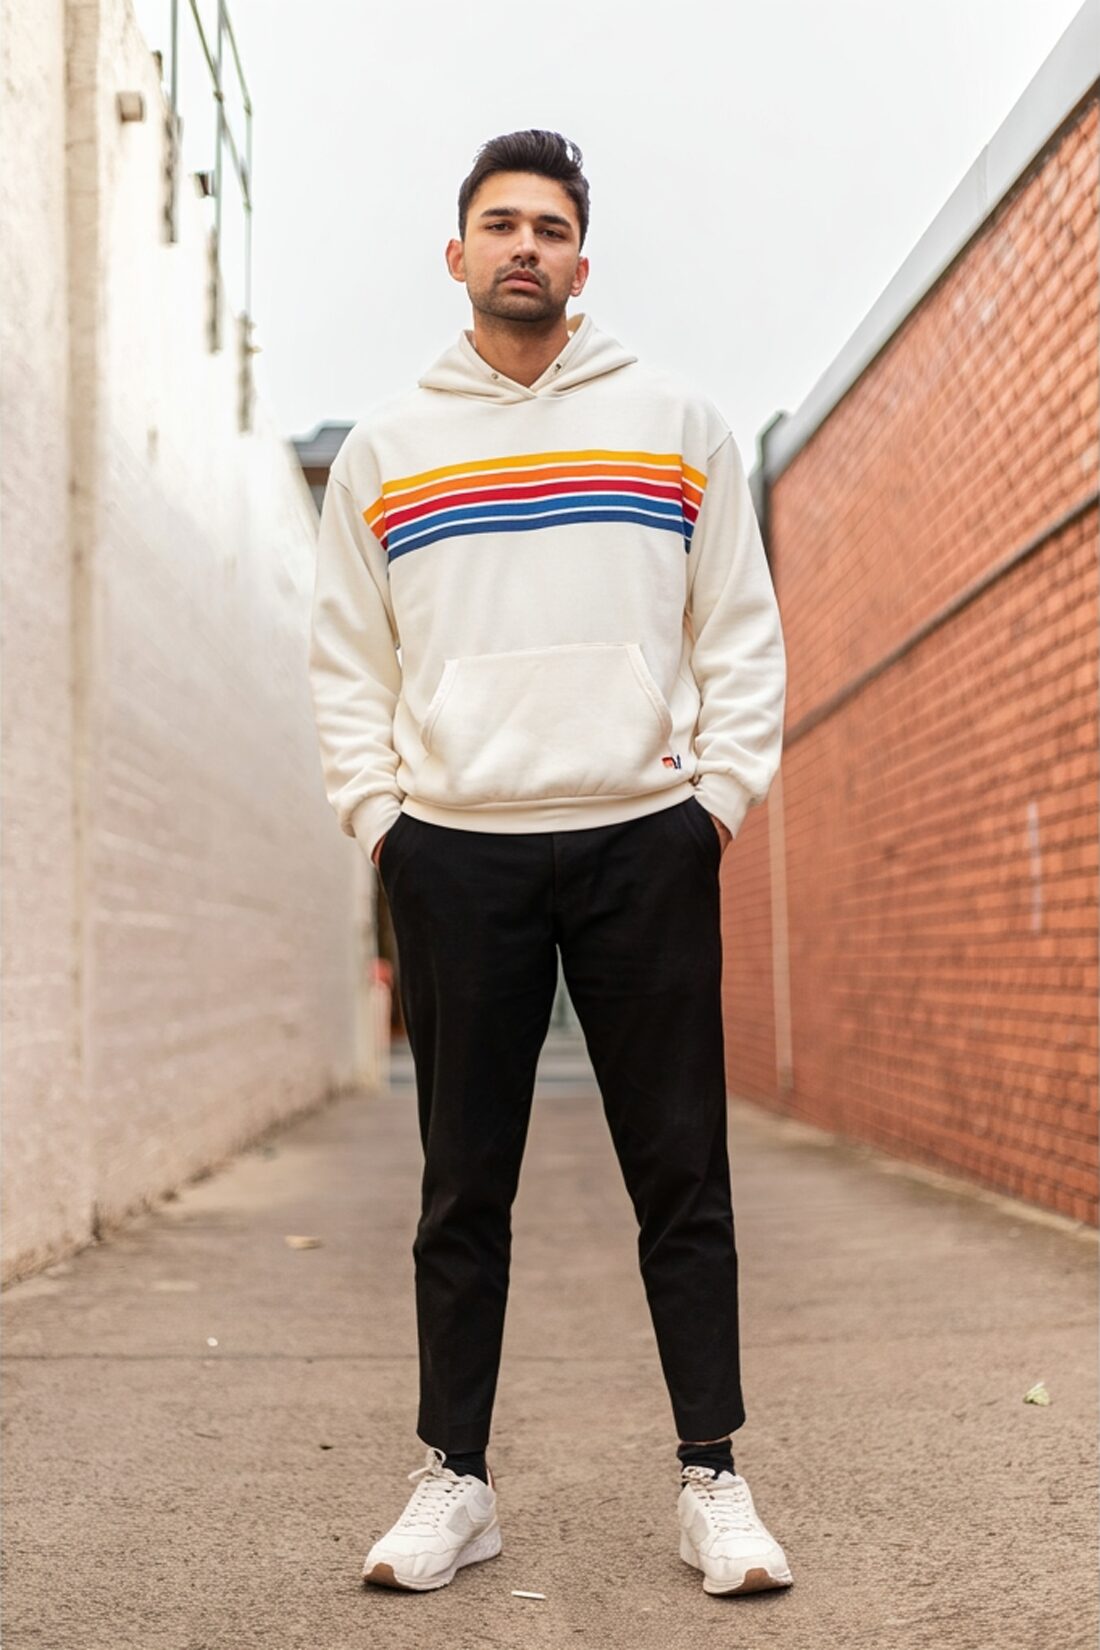
A real shopper try-on — your garment on their body, generated from a single selfie.
2. Getting around
Six places in the admin, each one a step in the flow.
🏠
Home
Your dashboard — usage this cycle, plan status, and shortcuts back into the work.
📦
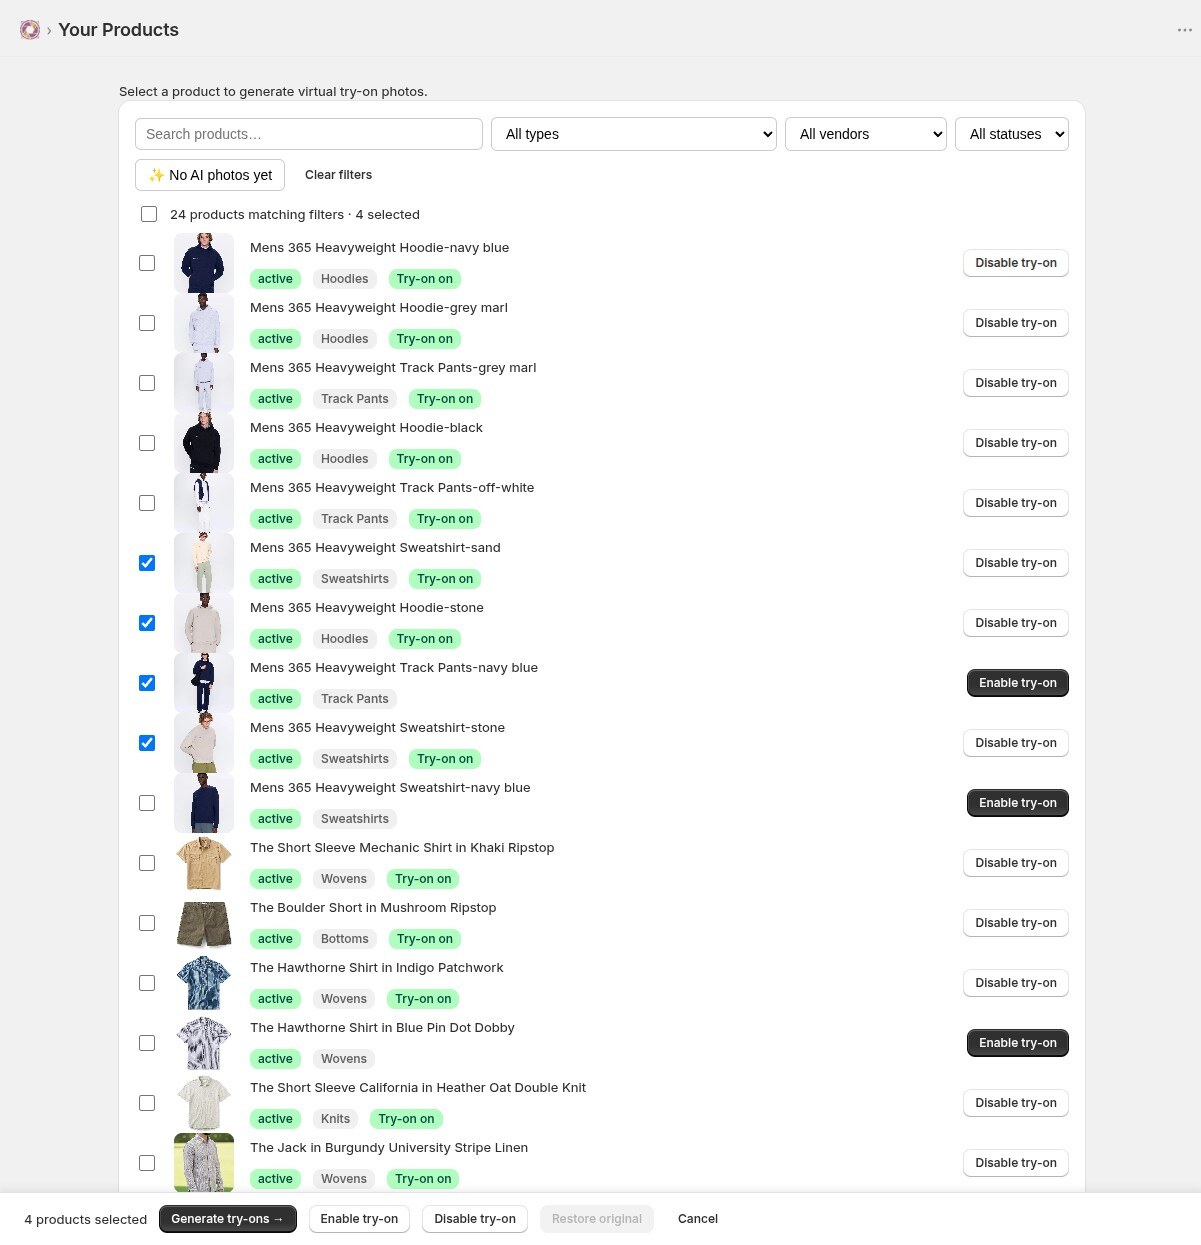
Products
Your catalog — pick what to work on and switch the storefront Try-On on or off per product.
🧍
Models
Your reusable AI models and their pose packs.
📈
Try-On activity
Every storefront try-on shoppers run, as it happens.
⚙️
Try-On settings
The storefront widget — button label & colours, and per-shopper limits.
💳
Billing
Your plan and usage, billed through Shopify.
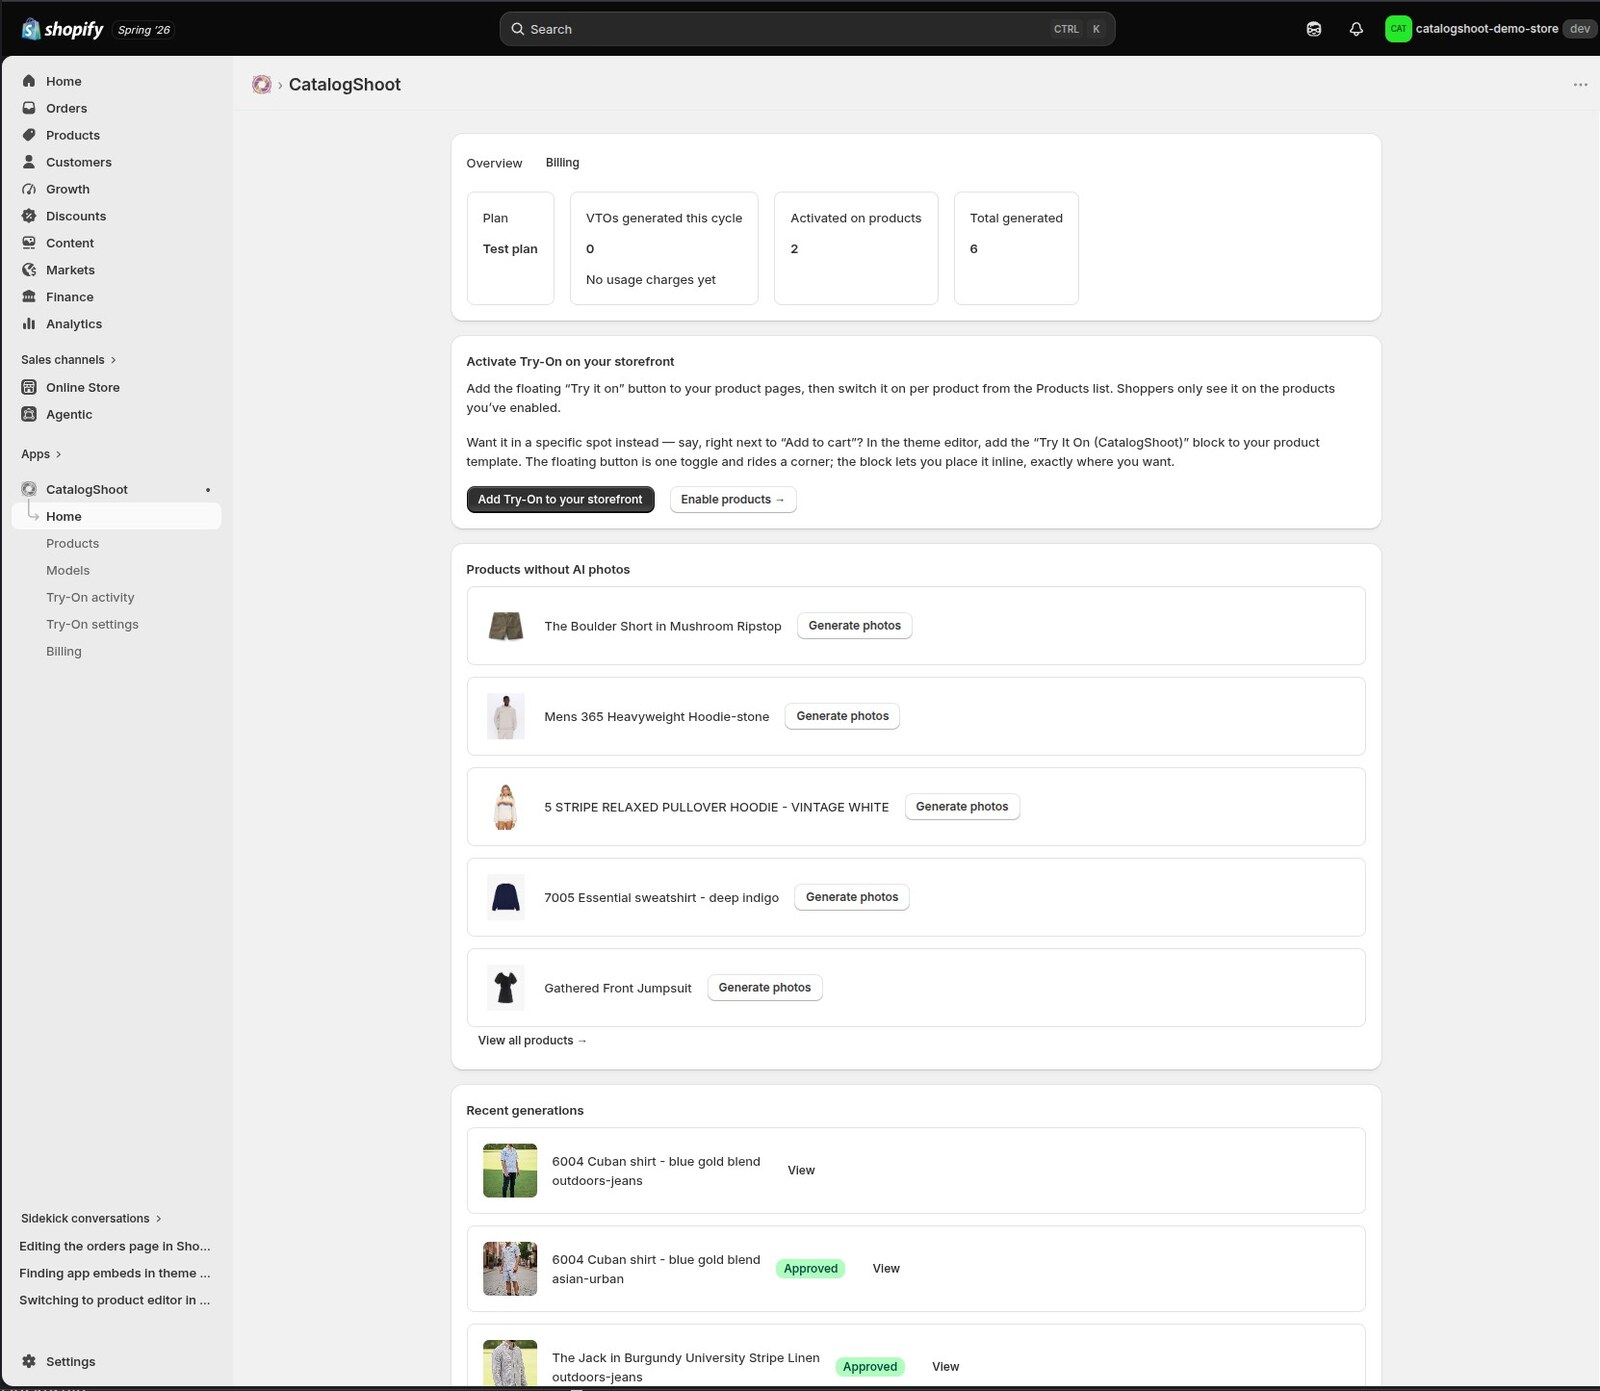
The CatalogShoot admin — Home, with usage and quick starts
3. Models & poses
A model is the person who wears your garments. Build one once and reuse it everywhere, so your catalog looks like a single, consistent shoot.
Create a model
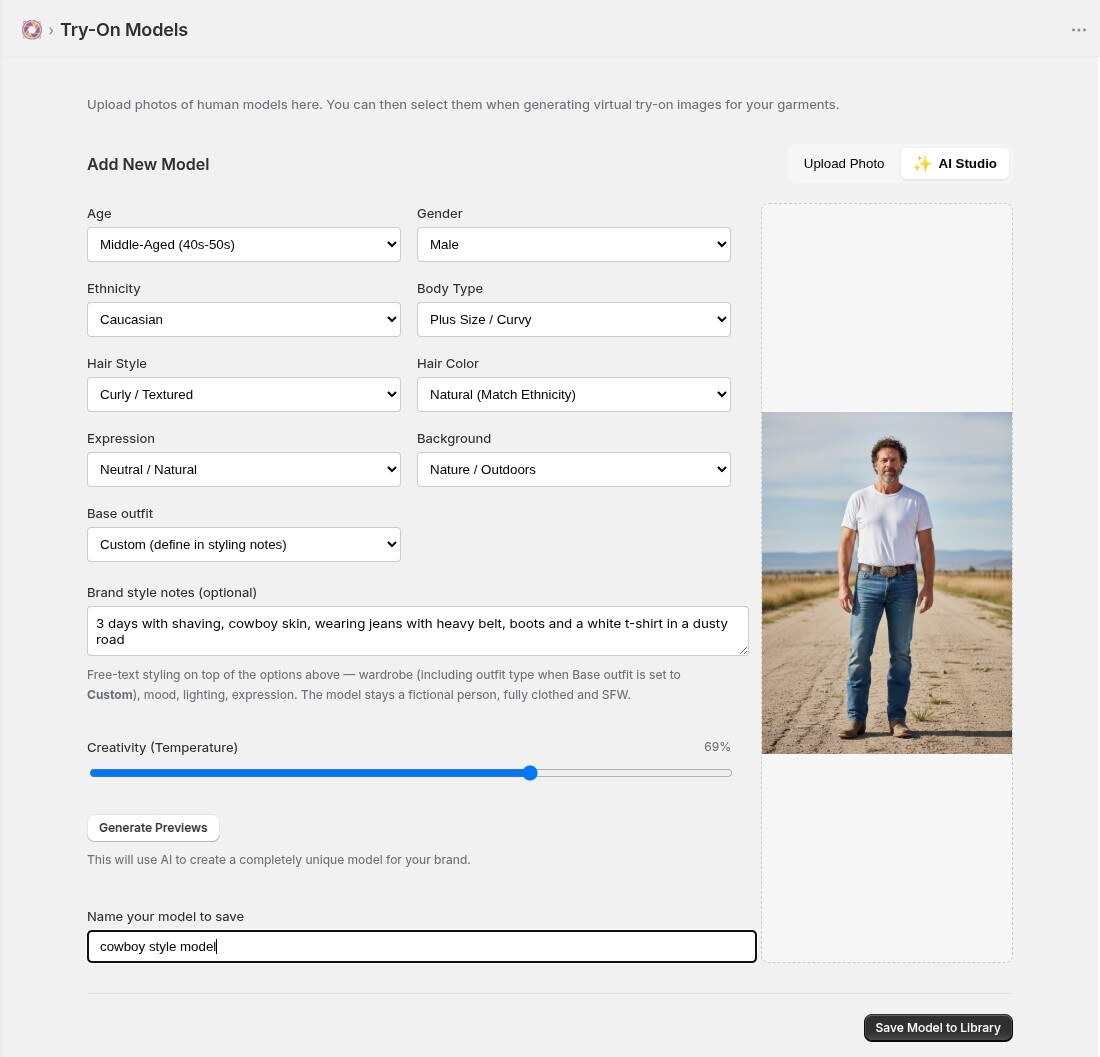
In Models → Model Studio, describe the look you want — body type, skin tone, hair, overall vibe — and generate. Keep the ones that fit your brand.
Add poses
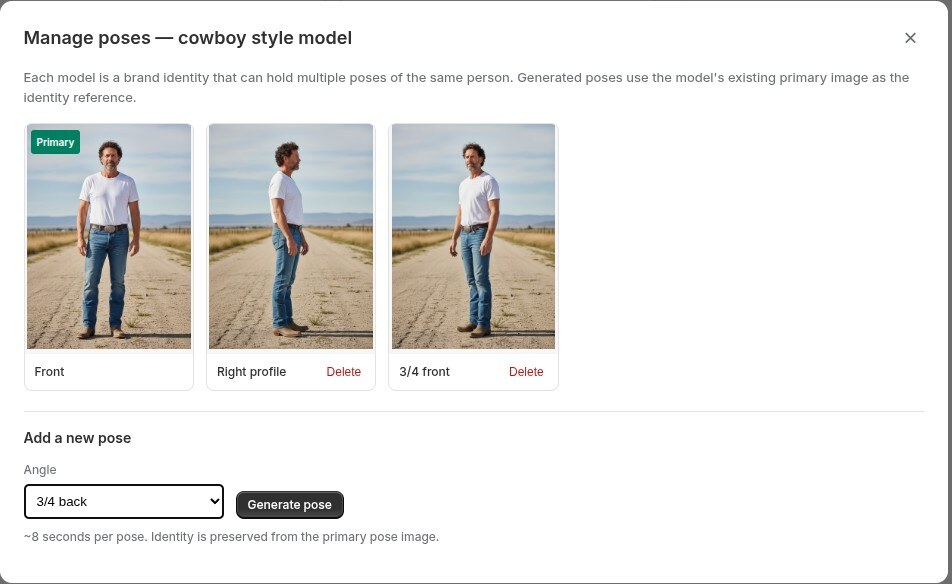
Each model carries a pose pack — front, side, and more. Poses give every product the same set of angles, so the catalog stays uniform.
Model Studio — describe a model and generate itA model's pose pack — front, left, and more for consistent angles
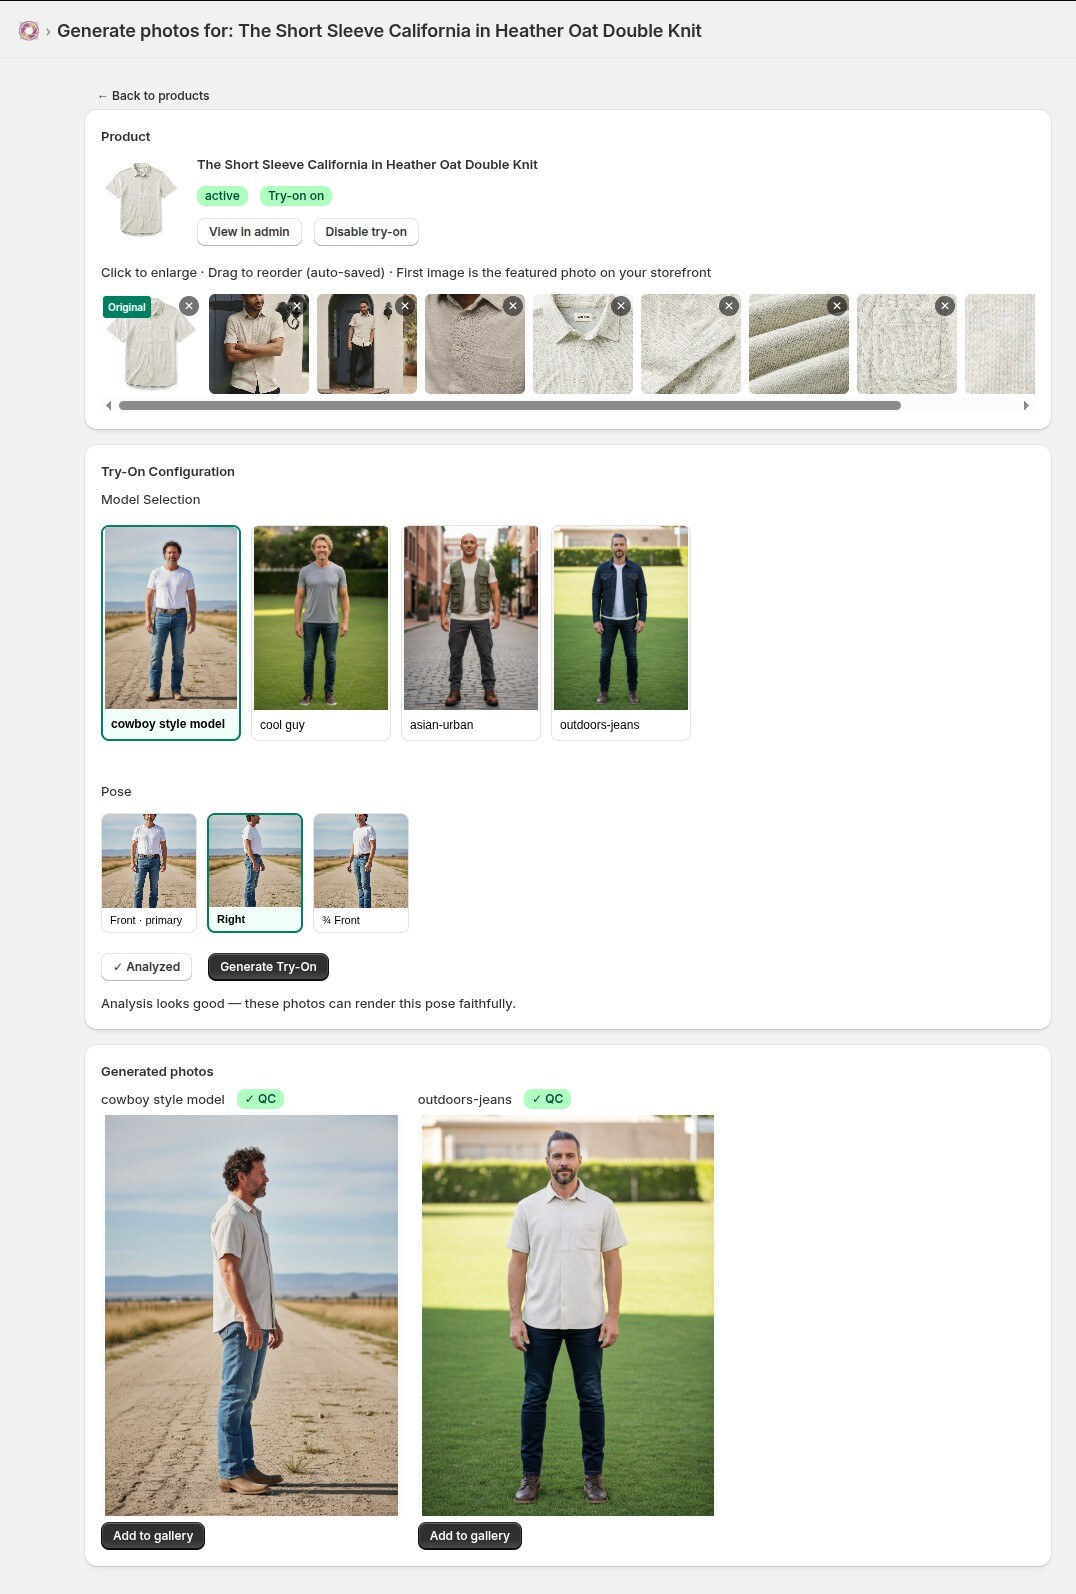
4. Generate try-ons
Now dress your model in a real product.
Pick a product
Open Products and choose the garment you want catalog photos for. CatalogShoot uses the images already on the product — nothing new to shoot.
Choose model + pose
Select one of your models and a pose. This is the angle and the person your garment will appear on.
Generate
Get a full-resolution try-on in seconds. Generate a few — different poses or models — and compare.
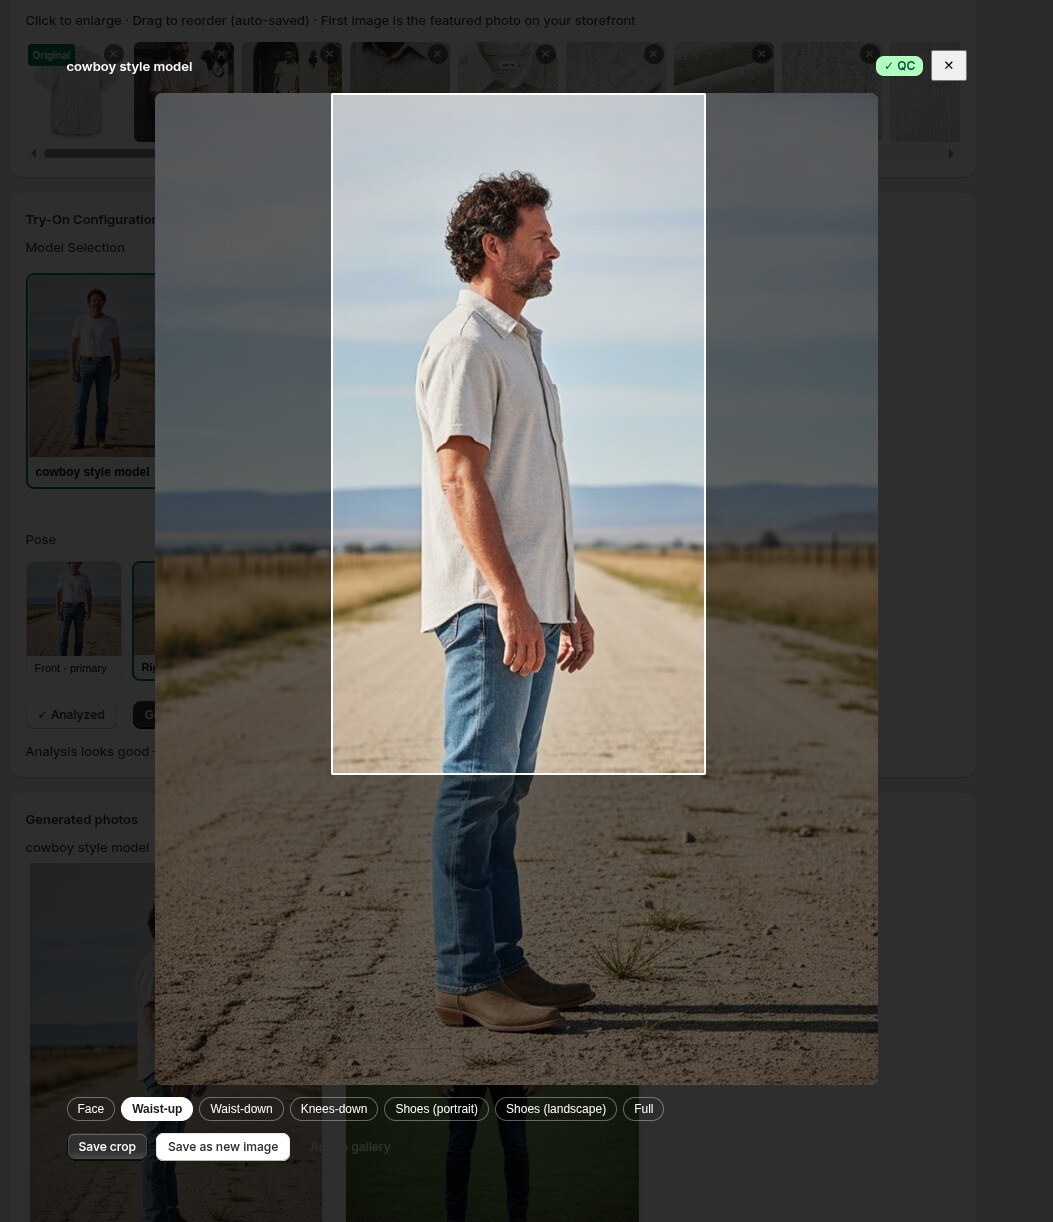
Review, then publish
Zoom in, crop if you like, and when a shot is a keeper, Add to gallery to publish it to the product on Shopify. Don’t love it? It never leaves CatalogShoot.
The generate screen — product, model and pose pickerReview and crop a result before publishing
5. Turn on the storefront Try-On
This is what makes CatalogShoot more than a photo tool: shoppers put your garment on their own body from a selfie, right on the product page.
Enable Try-On per product
In Products, switch Try-On on for the items you want it on (or enable a whole category or vendor in bulk). Off by default, so you stay in control.
Add the button to your theme
In the Shopify theme editor you have two options — use either or both:
Inline button — add the Try It On block to your product template and drop it wherever you like (next to the price or Add-to-cart).
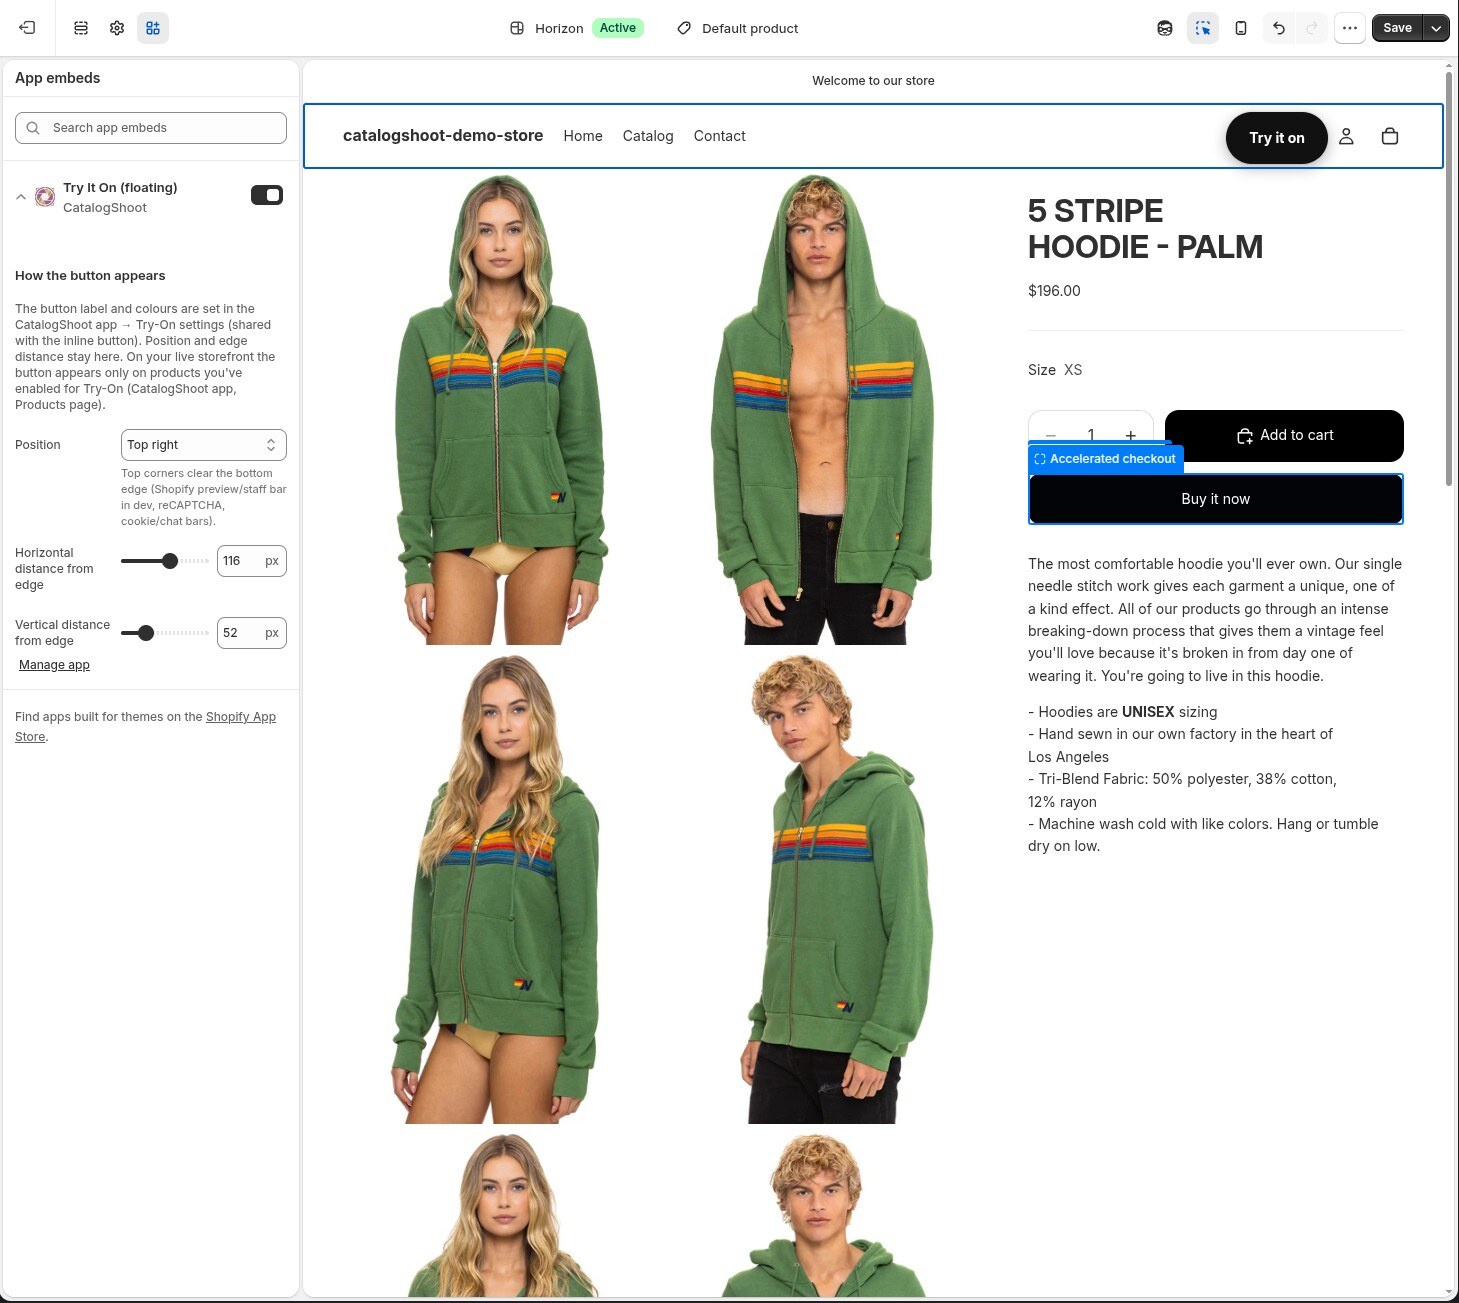
Floating button — turn on the Try It On (floating) app embed for a button that rides a corner of every enabled product page. No placement needed.
That's it
On enabled products the button appears; a shopper taps it, uploads a photo, and sees your garment on themselves — then adds to cart, or saves and shares the look.
A shopper taps Try-On, uploads a selfie, and sees the garment on themselvesProducts page — switch Try-On on per product or in bulkAdding the Try-On button in the Shopify theme editor
6. Style the button
The button’s label and colours are set in one place — the app’s Try-On settings — and both buttons (inline and floating) read from it, so they always match. Set it once; no editing per block in the theme editor.
✏️
Label
Whatever fits your store — “Try it on”, “See it on you”, “Virtual try-on”.
🎨
Colours
Pick a button colour and text colour from the swatch, or paste a brand hex. A live preview shows exactly what shoppers see.
📍
Placement
The inline button goes wherever you drop it; the floating button has corner + edge-distance controls. Need more? Both expose stable CSS classes.
Try-On settings — the Storefront button section with label, colour pickers and live preview
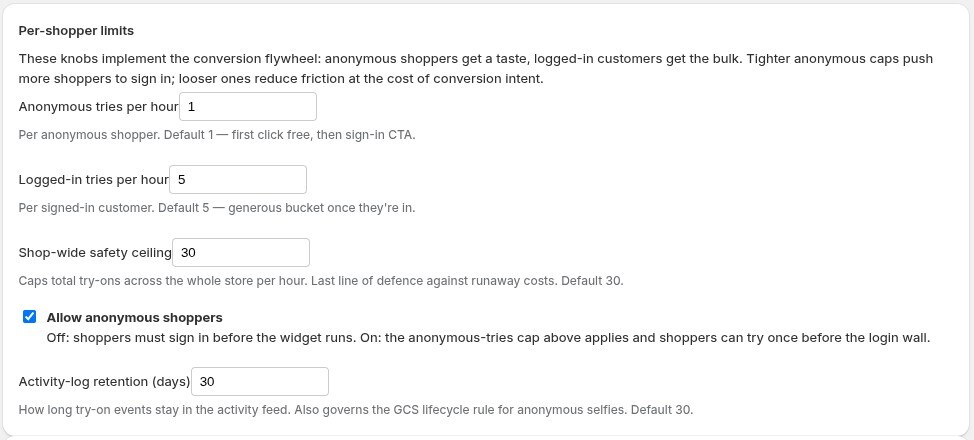
7. Per-shopper limits
The Try-On settings page also tunes the conversion flywheel — how much shoppers can try before signing in, and a safety ceiling so costs never run away.
🙈
Anonymous tries
A free taste for first-time visitors. Tighter caps nudge more shoppers to sign in; looser caps reduce friction.
🙋
Logged-in tries
A more generous bucket once a shopper signs in — the reward for converting.
🛡️
Shop-wide ceiling
A whole-store hourly cap — your last line of defence against runaway usage.
Per-shopper limits — anonymous, logged-in, and a shop-wide safety ceiling
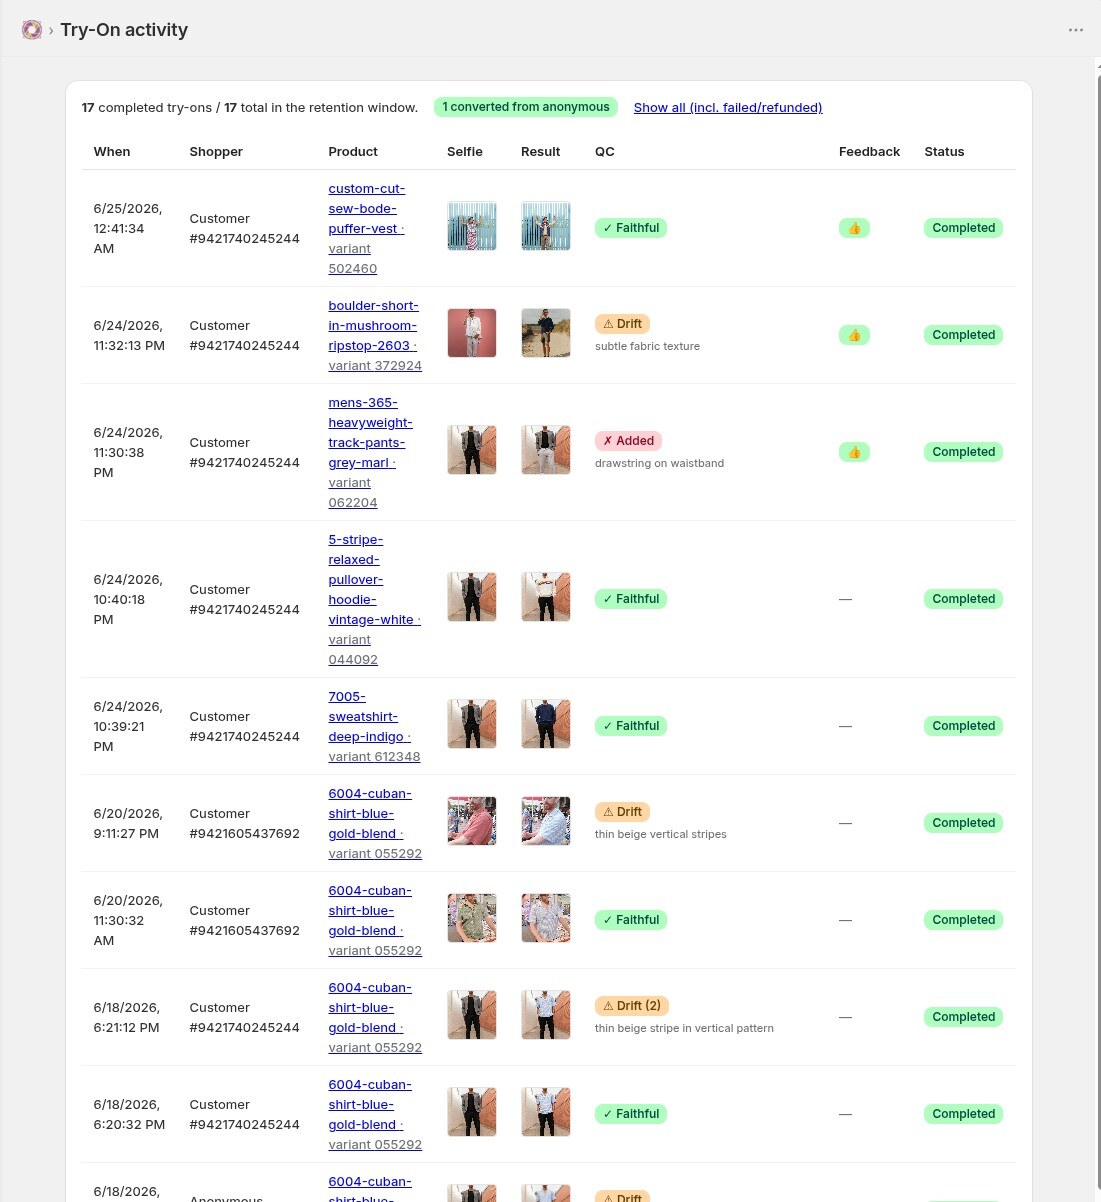
8. Try-On activity
See try-ons as shoppers run them — which products are getting tried on, and how often. It’s your read on what’s resonating, and a sign of buying intent.
Try-On activity — a live feed of storefront try-ons
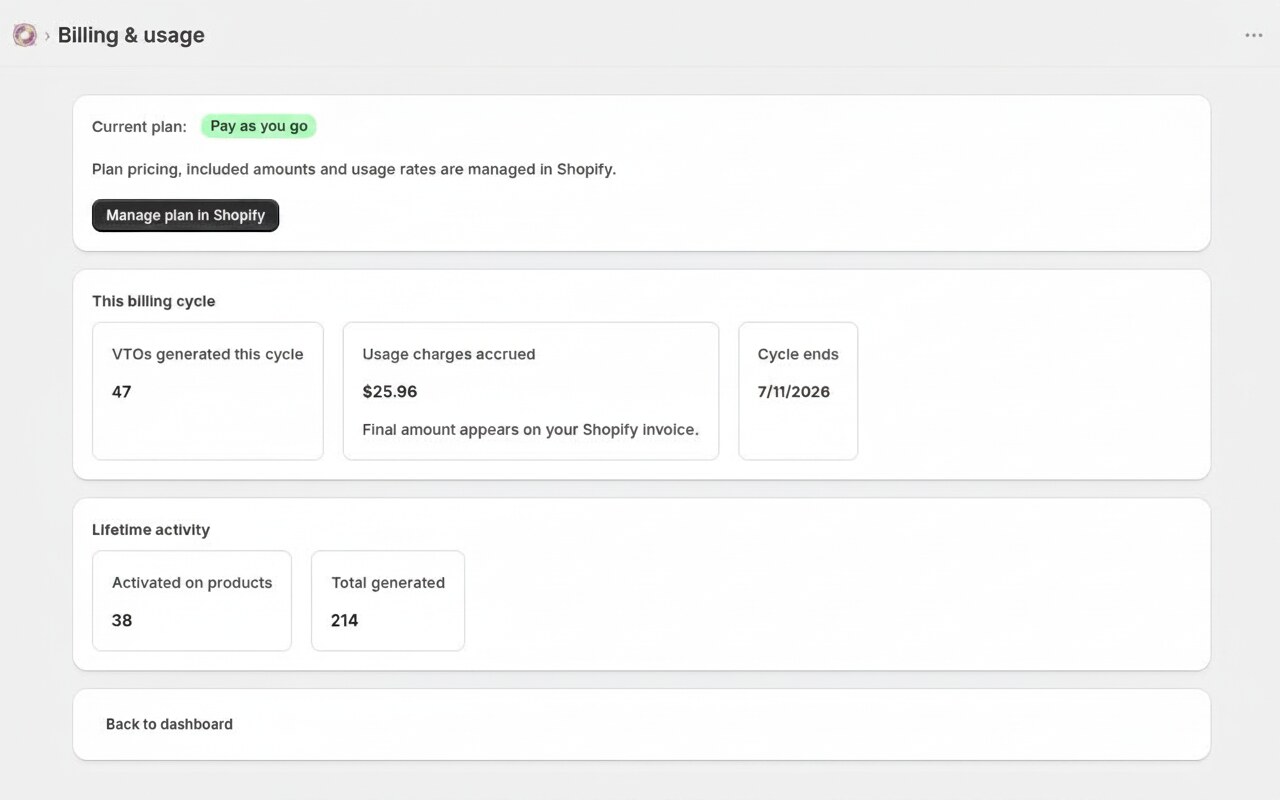
9. Billing & plans
Every plan is a low monthly base plus your photo generations — a block included free, then a per-generation rate that drops as you scale. Billed through Shopify, alongside the rest of your store.
Pay as you Go
$0/mo
Plus usage
First 3 photo generations free
Then $0.59 each
Starter
$19/mo
Plus usage
First 150 photo generations free
Then $0.49 each
Most popular
Growth
$49/mo
Plus usage
First 500 photo generations free
Then $0.30 each
Scale
$99/mo
Plus usage
First 1,000 photo generations free
Then $0.25 each
Billing — plan, usage this cycle, and lifetime activity